In this post, we'll go through step-by-step instructions for clearing the SharePoint configuration cache in SharePoint Server 2019 in an on-premises environment.
Why do you need to clear SharePoint Configuration Cache?
Clearing the cache in SharePoint is one of the first steps in troubleshooting and the great one for unexpected issues in the SharePoint for example:
How to Clear SharePoint Configuration Cache?
On each and every server in your SharePoint farm, you must do the following steps:
- Stop the SharePoint Timer service on all the servers.
- Clear SharePoint Cache files.
- Modify the Cache.ini.
- Start SharePoint Timer Service.
1) Stop the SharePoint Timer service on all the servers.
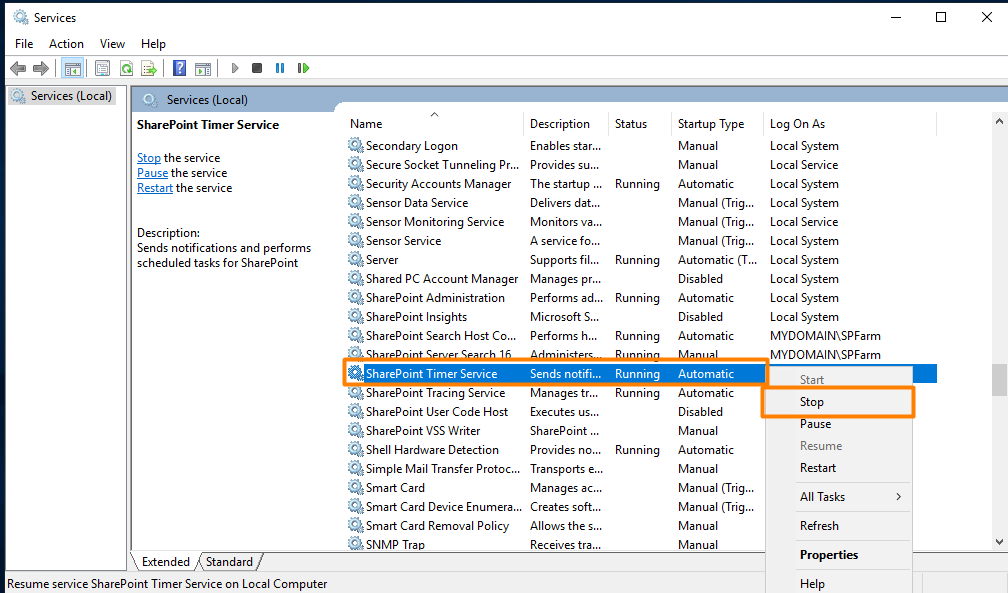
- Open services then search for "SharePoint Timer service" right click then stop.

- Or you can stop service through Powershell
net stop SPTimerV4
2) Navigate to the following folder:
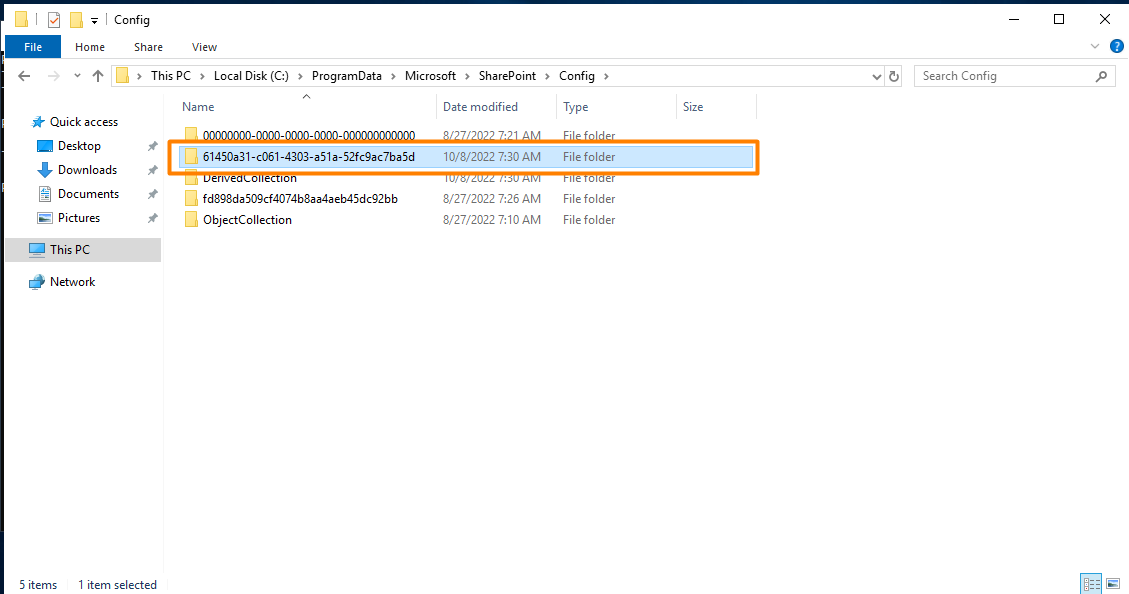
- %SystemDrive%\ProgramData\Microsoft\SharePoint\Config
- Locate the folder with a GUID name, such as 61450a31-c061-4303-a51a-52fc9ac7ba5d.

3) Delete Temp files
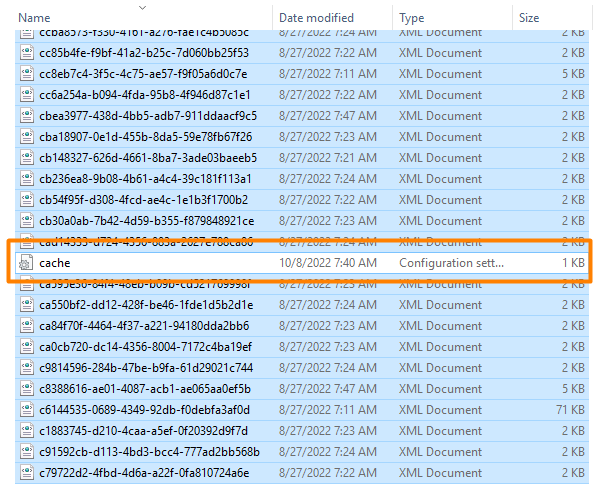
- Open the relevant folder and delete all files EXCEPT the Cache.ini file. (DO NOT DELETE THIS FILE)

- After deleting files, Cache.ini should be the only file in the folder.
4) Modify the Cache.ini
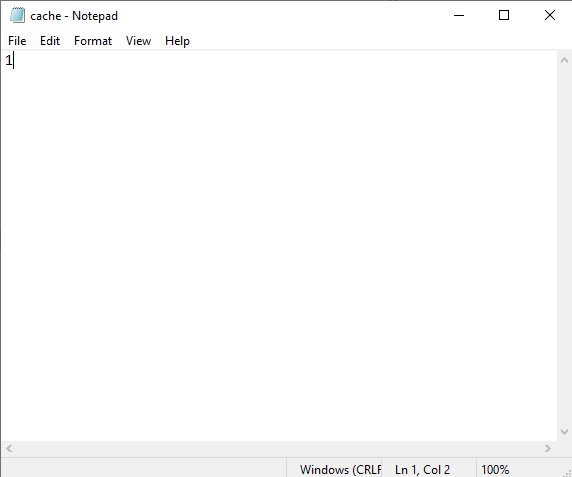
- Open Cache.ini file in notepad.
- Delete the content of the file for example (23139).
- Replace the deleted content with number one (1) as shown in the below image.

- Save and exit the Cache.ini file
5) Start SharePoint Timer Service
Once the steps are done for each server in the farm, start the SharePoint Timer Service again.
- Open services then search for "SharePoint Timer service" right click then start.
- Or you can start service through Powershell
net start SPTimerV4
- The SharePoint Timer Service will begin populating this folder and modifying the number in the Cache.ini file.
See Also